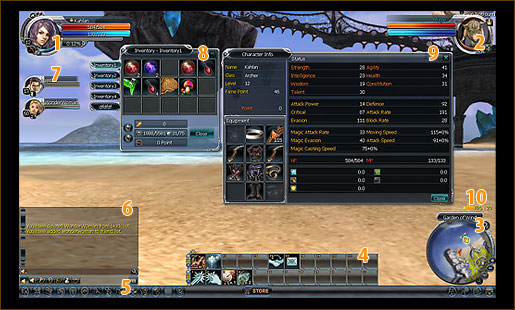
| BASIC INTERFACE |
| |
 |
| |
| 1. CHARACTER STATUS |
|
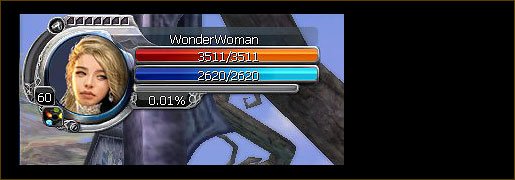
| The character status bars represent different things for your own character. |
| |
 |
| |
1. Level
2. Class
3. Character Name
4. Health Points
5. Mana Points
6. Experience Bar
7. Experience progress towards next level
8. Mortal gauge and tokens |
| |
| 2. TARGET STATUS |
|
| When you click on another person, monster or NPC, their status bars will appear on the top right of the screen. |
| |
 |
| |
1. Name of the target
2. Health Points
3. Mana Points |
| |
Depending on what type of target you have selected, different information may be displayed.
When another player's character is selected, you will see their level and an icon representing their profession. Characters that are level 10 and higher will only reveal the first digit of their level. For example a level 22 character may display "2X".
When a monster is selected then their attribute and a skill will be shown.
When an NPC is selected, then no other extra information is provided. |
| |
| 3. MINI MAP |
|
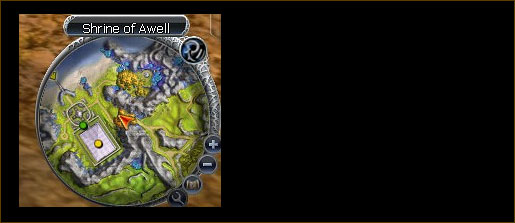
| The mini map shows the surrounding land and nearby NPCs. |
| |
 |
| |
1. Location Name
2. Priston Time
3. Character location - shows where you're standing and the direction that you're facing.
4. Zoom in and zoom out on the mini map
5. Open the local map window
6. Setup the mini map options |
| |
| 4. QUICK SLOT |
|
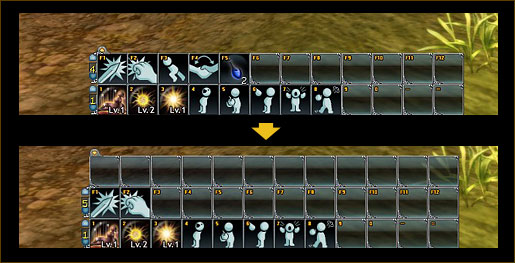
| Drag skills, consumable items, and other actions on to the Quick Slot bar for easy access. |
| |
 |
| |
The Quick Slot bars can be extended to 3 levels by clicking on the arrow on the top left corner.
The first and second level of Quick Slot bars also have 3 pages to allow you to quickly switch between sets of skills as needed. |
| |
| Hot keys for the main Quick Slot |
Shift + 1 - Switch to the first page of the Quick Slot
Shift + 2 - Switch to the second page of the Quick Slot
Shift + 3 - Switch to the third page of the Quick Slot |
| |
| 5. TOOL BAR |
|
| Drag skills, consumable items, and other actions on to the Quick Slot bar for easy access. |
| |
 |
| |
| The tool bar is the bar at the bottom of the screen containing icons to bring up frequently used windows in the game. Some windows especially the Looting Pet Information window, Looting Pet Inventory window and the in-game Help can only be accessed by clicking on the tool bar. |
| |
| 6. CHAT BOX |
|
| 1. Input |
| |
 |
| |
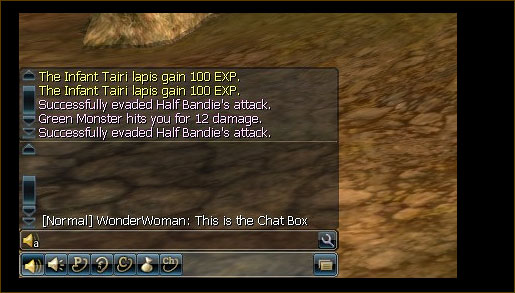
Press ENTER key on the keyboard to start activate the chat box. Press ENTER first each time you want to start typing a message to another player, then ENTER again to send the message.
You can increase the chat box's area by holding right click anywhere in the middle of the box and dragging the mouse outwards. |
| |
| 2. Chatting Commands |
| |
 |
| |
| 7. PARTY MEMBERS |
|
Partying with others is sometimes the best way to overcome difficult challenges or to level up farther as opposed to always playing online. Players in a party together may share the experience gained from defeating monsters and have the option to set the distribution mode for items picked up. Select "Invite to Party" on the chosen player's option window to send party invitation. |
| |
 |
| |
| 8. INVENTORY |
|
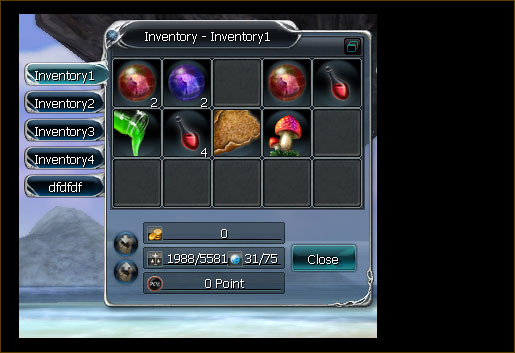
Press “I” to open the Inventory window. Player has five inventory bags and each inventory contains 15 boxes. Player allows wearing the equipment by left click on the certain equipment. Player may also want to drag the item (such as potion) to Quick Slot Bar as a shortcut. |
| |
 |
| |
| 9. CHARACTER INFORMATION |
|
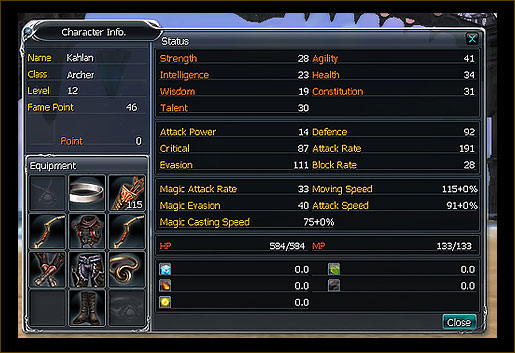
| Press "C" on the keyboard to display the Character Information window. |
| |
 |
| |
This window shows the character's details, overall stats and equiped items. |
| |
| 10. FPS (FRAMES PER SECOND) |
|
| When this feature is enabled in Options, you will be able to see your frames per second while playing. |
| |
 |